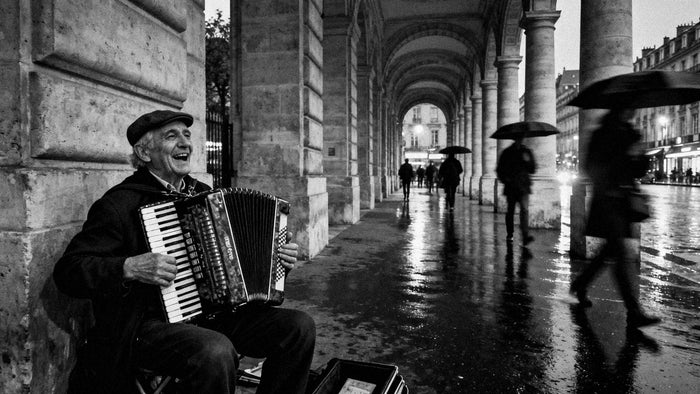
How to Get the CineStill 800T Look in Lightroom
A step-by-step Lightroom recipe for the CineStill 800T look: cool tungsten colour, warm neon, masked halation and grain for cinematic night photos.
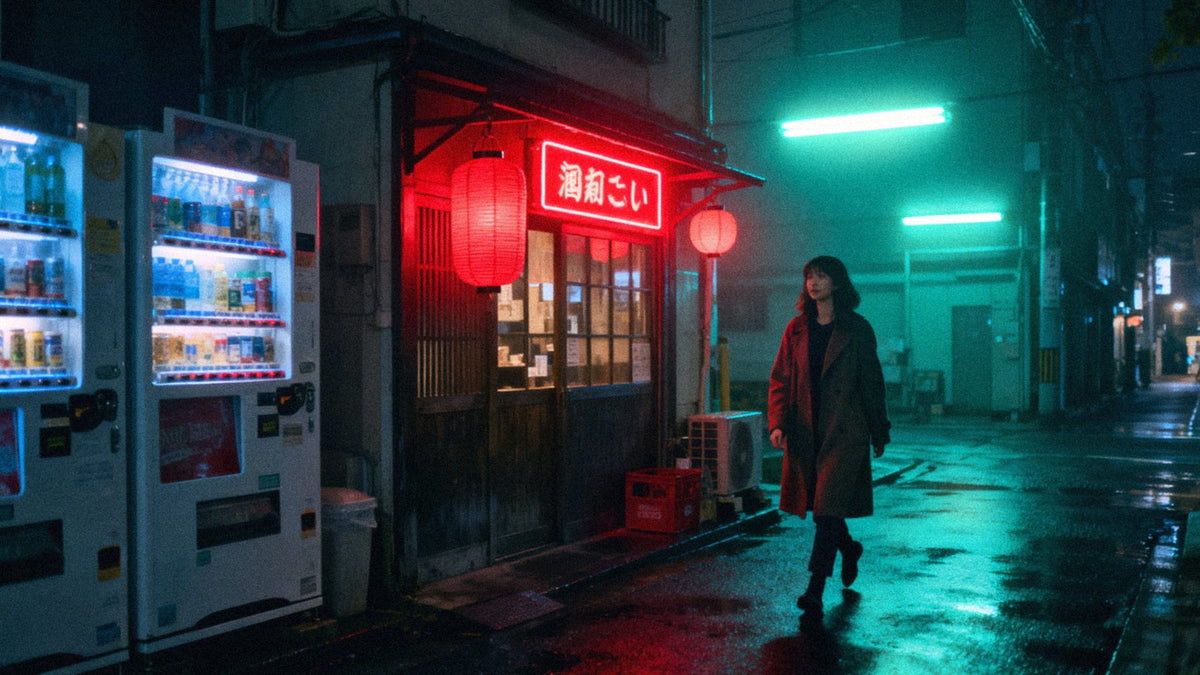
To get the CineStill 800T look in Lightroom, start with a cool, tungsten-leaning white balance, push the shadows toward teal and cyan, keep the highlights and neon warm, and add a soft red glow around bright light sources with masks. Finish with fine-to-medium grain and gentle contrast. The result will not be identical to the film, but it gets you close to the cinematic night look that made 800T famous.

What CineStill 800T actually is
CineStill 800T is a colour negative film made from motion-picture stock. CineStill does not publish its source, but it is widely understood to be based on Kodak's Vision3 500T cinema film. The "T" means it is tungsten-balanced: it renders correctly under warm artificial light of around 3200K, so it records street lamps and interiors as fairly neutral, and daylight as distinctly blue.
Cinema film carries a black backing layer called remjet. It protects against static and, importantly, against halation: without it, very bright light passes through the emulsion, bounces off the back of the film base and re-exposes the layers from behind. CineStill removes the remjet so the film can be developed in standard C-41 chemistry at any lab. The side effect is the signature: a red-orange halo around bright highlights such as headlights, neon tubes and street lamps. The halo tends to read as red because the red-sensitive layer sits closest to the base, so it catches most of that reflected light.
That combination of cool, clean tungsten balance, cyan-green city light and warm red glow is what people mean when they say "the 800T look".
Why night and neon photographers love it
Night scenes in a city are full of mixed light: sodium lamps, LEDs, shop windows, signs. Daylight film turns all of that into a muddy orange soup. A tungsten stock pulls it back toward neutral, lets fluorescent and LED light drift into cyan and green, and keeps neon reds and pinks saturated. The halation then turns every point of light into a small, glowing event. It looks like a still from a film, which is exactly why cinematic night photos and 800T are so often mentioned together.
It also forgives a lot. The grain is visible but not harsh, skin under warm light stays pleasant, and the slight softness hides the clinical edge of a modern sensor.
The manual Lightroom recipe
These are starting ranges for a raw file shot at night under mixed artificial light. Every photo is different, so treat the numbers as a direction, not a formula.
1. White balance and basic tone
- Temp: pull it cooler than "correct", often somewhere around 3000–3800K on a raw night file. Warm lamps should look only slightly warm, and anything lit by LED or moonlight should go blue-cyan.
- Tint: a small move toward green, around −5 to −10, gives the cyan-green city cast typical of the film.
- Exposure: keep the image genuinely dark. Night should look like night.
- Highlights: around −30 to −60, so signs and lamps keep some colour rather than clipping to white.
- Shadows: around +10 to +25 for a little detail, but do not flatten the scene.
- Blacks: around −5 to −15, then lift them back slightly with the tone curve.
- Clarity: around −5 to −15. Negative film is soft, and lower clarity helps highlights bloom.
2. Tone curve
Use the point curve to raise the black point a touch (drag the bottom-left point up to roughly 10–20 on the output scale) and add a gentle S in the midtones. This gives the faintly lifted, filmic blacks without washing the picture out. If the image feels too digital, soften the top of the curve a little so highlights roll off instead of hitting a wall.
3. Color Mixer (HSL) for neon and skin
- Red: Hue around +5 to +10 toward orange, Saturation around +5 to +15. Neon reds should glow, not turn magenta.
- Orange: Hue slightly toward red (−3 to −8), Saturation around −5 to −15 so street lamps and skin do not become radioactive.
- Yellow: shift Hue toward green (+10 to +20) and reduce Saturation. Sodium light reads less "orange" on 800T.
- Green and Aqua: shift Green toward aqua and Aqua toward blue, with modest saturation. This gives LED and fluorescent light its cyan tone.
- Blue: Hue slightly toward aqua (−5 to −10), Luminance down a little so skies and shadows stay deep.
4. Color Grading
- Shadows: teal-cyan, hue around 190–210, saturation around 10–20.
- Midtones: leave neutral or add a very slight cyan.
- Highlights: warm, hue around 35–50, saturation around 10–20.
- Blending: around 60–80 for smooth transitions; Balance slightly negative if you want the cool shadows to dominate.
In Calibration, a small shift of the Red Primary hue (around +5 to +10) and Blue Primary saturation (around +5 to +15) can make the overall palette feel more like a scanned negative. Go gently; Calibration affects everything.
How to fake halation in Lightroom (honestly)
Lightroom has no halation control, so any halation Lightroom technique is an approximation. Real halation is light physically scattering inside the film; we can only paint a warm glow where we expect it to appear. Done subtly, it is convincing.
- Find the light sources. Headlights, neon tubes, lamps, bright windows. Halation appears at the edge of the brightest areas, not on everything.
- Create a mask. For a single lamp, a small Radial Gradient with high feather works well. For a sign or a row of lights, use a Brush with high feather and low flow. For many lights at once, try a Luminance Range mask selecting only the top end of the tonal range, then increase its smoothness so the selection spreads beyond the hot spots.
- Add warmth and red. In the mask, push Temp warmer and Tint slightly toward magenta, or use the mask's colour tint swatch with a red-orange at low saturation.
- Add glow. Raise Exposure slightly (around +0.1 to +0.4), and drop Clarity (around −30 to −60) and Texture (around −20 to −40). Lower clarity and texture is what makes the edge bloom rather than just change colour.
- Check at 100% and at full screen. A halo should hug the light, fading to nothing within a short distance. If it looks like a coloured cloud, reduce the mask size or amount.
For a softer, wider glow, duplicate the mask, make it larger and set its effects at roughly half strength. Two layered halos read more naturally than one heavy one.
Grain
800T is a fast film and shows it. In Effects, try Grain Amount around 20–35, Size around 25–35 and Roughness around 50–60. Add grain last, after any noise reduction, and judge it at the size the image will actually be seen. A high-ISO digital file already has noise, so you may need less than you think.
How to shoot for the look
- Expose for the highlights. Protect neon and lamps from clipping; you can lift shadows later, but blown colour cannot be recovered.
- Look for practical lights. Signs, shop windows, car lights and street lamps in the frame give you something to glow.
- Go out when it rains. Wet streets double every light source and give halation and colour more surfaces to play on.
- Shoot raw. White balance is the backbone of this look, and a raw file lets you set it freely.
- Use blue hour. Cool residual daylight against warm artificial light is the classic 800T palette.


Daylight vs night: CineStill 800T vs CineStill 400D
If you like the motion-picture feel but shoot mostly in daylight, 800T is not always the right starting point. CineStill 400D is the daylight-balanced counterpart.
| CineStill 800T | CineStill 400D | |
|---|---|---|
| Colour balance | Tungsten (artificial light) | Daylight |
| Typical palette | Cool cyan-green shadows, warm neon | Warm overall, cool tones preserved |
| Halation | Strong red glow around lights | Softer red glow on bright highlights |
| Best for | Night, neon, interiors, rain | Sunlit street, travel, portraits outdoors |
| In daylight | Renders blue unless corrected | Renders naturally |
For more on choosing between film looks, see our guide to the best film presets for Lightroom.
What the HelloPresets 800T pack adds
The recipe above will get you there with patience. What a finished pack adds is the testing: settings that hold up across different light, cameras and scenes, so a whole set from one evening looks consistent without rebuilding the grade for every frame.
Our CineStill 800T film presets include 10 variations: Standard 1–5 for different scenes and exposures, plus Blue, Fade, Green, Night and Warm for when the light leans one way or you want a specific mood. Each comes as .xmp for Lightroom Classic, Lightroom desktop and Photoshop Camera Raw, .dng for the free Lightroom mobile app, and .costyle for Capture One. Halation in a preset works the same way as the manual method: it is a simulation, and on some photos you will still want to add or refine a mask around specific lights.

If you shoot both day and night, the CineStill Bundle pairs 800T with our 400D presets for $29 (€29), so your daylight and night work can share the same cinematic language. Not sure how to load them? Our installation guide covers every app.
A quick note: HelloPresets is an independent studio and is not affiliated with CineStill or Kodak. The film names simply describe the look our presets are inspired by.
FAQ
Can you get the CineStill 800T look in Lightroom without a preset?
Yes. A cool white balance, teal shadows, warm highlights, controlled neon reds in HSL, masked halation and grain will get you most of the way. A preset mainly saves time and keeps a series consistent.
Why does CineStill 800T have red halos around lights?
CineStill removes the remjet backing from the original cinema film. Without it, bright light reflects off the film base and re-exposes the emulsion from behind, mostly in the red-sensitive layer, creating a red-orange glow.
Does a CineStill 800T preset add halation automatically?
A preset can warm and soften bright areas globally, but true halation depends on where the lights are in each frame. For the most convincing result, add a small mask around key light sources.
Does the 800T look work in daylight?
It can, but a tungsten look turns daylight blue. That can be a deliberate cold, cinematic mood; for natural daylight colour, a 400D-style look is usually the better choice.
What camera settings work best for cinematic night photos?
Shoot raw, expose to protect highlights, use a wide aperture and a stable hand or support, and accept a higher ISO. Some noise blends well with added grain.
Do the presets work on Lightroom mobile?
Yes. The pack includes .dng files for the free Lightroom mobile app on iPhone, iPad and Android, alongside .xmp and Capture One files.